
Starbucks Cake Pop Recipe
This post contains affiliate links. As an Amazon Associate, I earn from qualifying purchases. This comes at no extra cost to you.
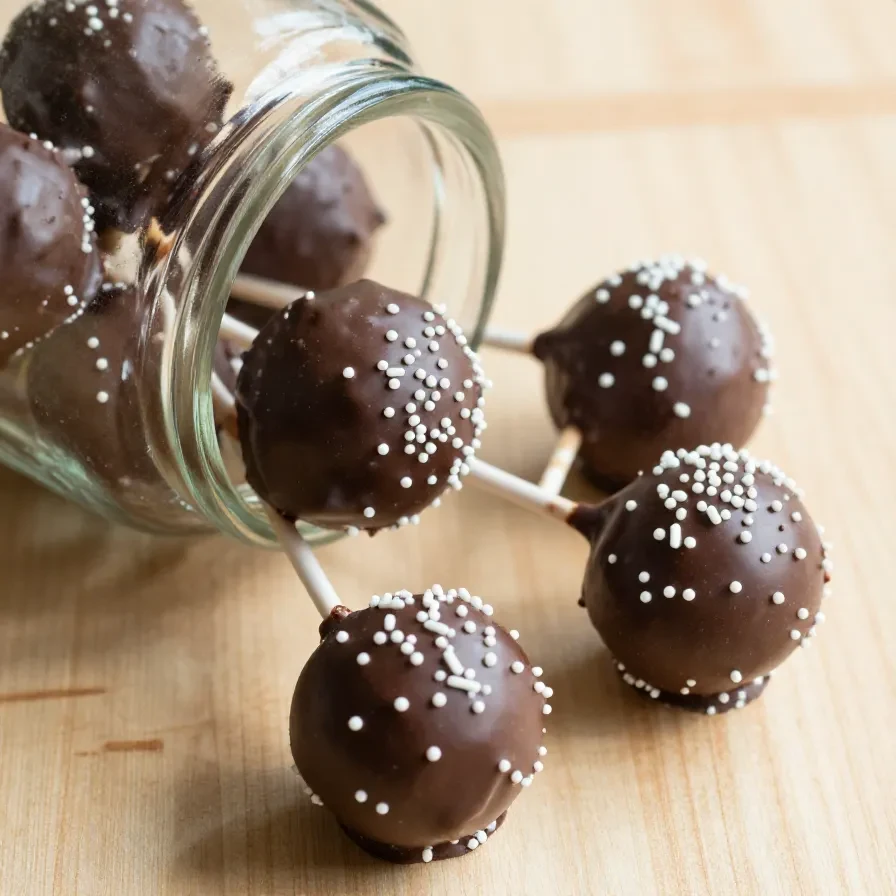
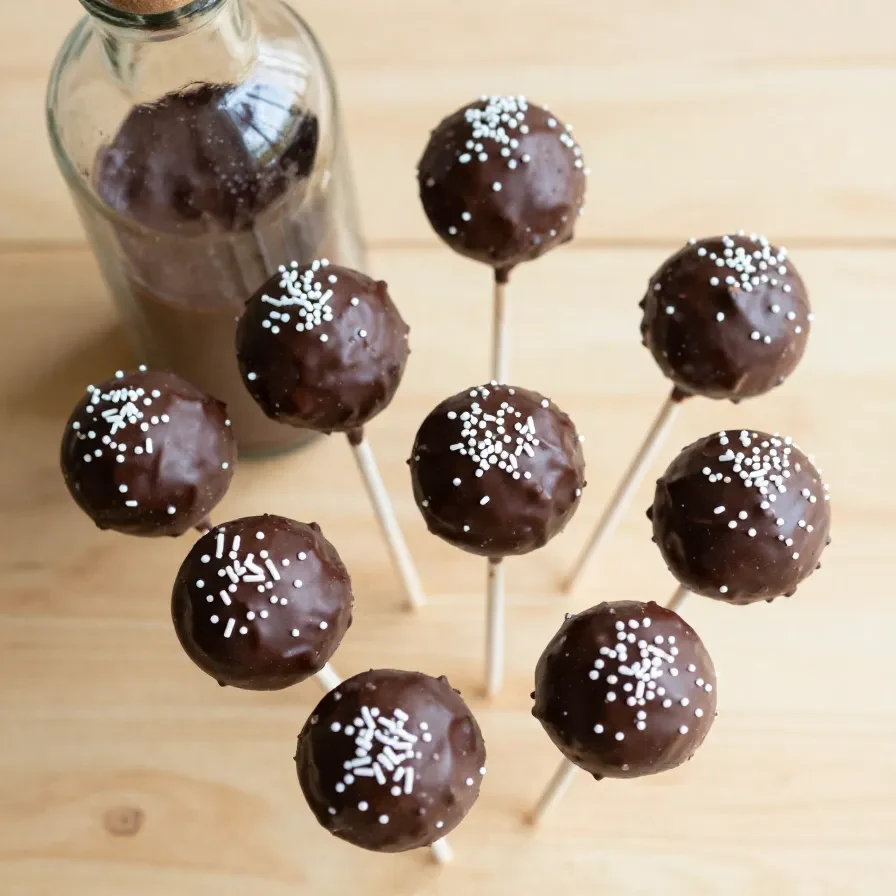
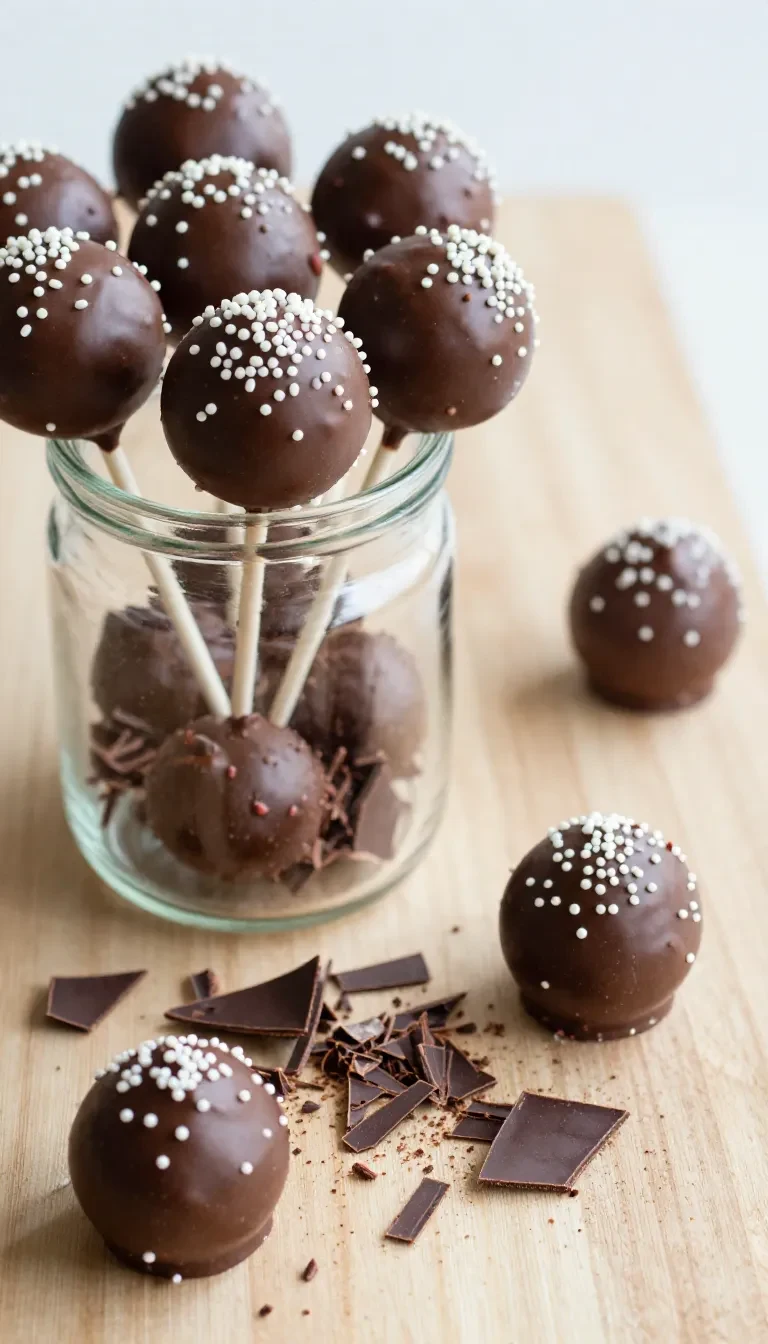
This Starbucks Cake Pop Recipe is your ultimate guide to recreating the iconic treat at home. With moist cake crumbs blended with creamy frosting, dipped in a smooth candy coating, and finished with vibrant sprinkles, they deliver a playful texture and sweet flavor perfect for any occasion. Whether you’re prepping for a party or indulging in a sweet snack, these cake pops are fun and easy to make.
Table of Contents
- Why Make Starbucks Cake Pops at Home
- Everything You Need for Starbucks Cake Pop Recipe
- How To Make Starbucks Cake Pop Recipe Step by Step
- Simple Ingredient Swaps for Cake Pops
- Pairing Ideas and Perfect Serving Tips
- Expert Tips for Perfect Cake Pops
- Storing and Reheating Starbucks Cake Pops
Why Make Starbucks Cake Pops at Home
- Save money on your favorite Starbucks treat by making them yourself. These copycat cake pops are perfect for budget-conscious bakers who want that same quality without the price tag.
- Customize your cake pops to your liking with flavors and decorations. Whether you prefer chocolate or vanilla, sprinkles or plain candy coating, this recipe is endlessly versatile.
- Enjoy a hands-on, creative baking experience. Rolling, dipping, and decorating each cake pop is a fun activity for all ages.
- A great option for parties or small gatherings. These bite-sized treats are easy to serve and universally loved by guests.
Everything You Need for Starbucks Cake Pop Recipe
- 1 box of vanilla or chocolate cake mix (plus ingredients required on the box)
- 1/2 cup vanilla or chocolate frosting
- 2 cups white or dark chocolate candy melts
- 2 tablespoons vegetable oil
- Sprinkles (optional, for decoration)
- Cake pop sticks
The candy melts are key for achieving that smooth, glossy coating reminiscent of Starbucks cake pops. The oil ensures the coating stays fluid, making it easier to dip and achieve a professional finish.
How To Make Starbucks Cake Pop Recipe Step by Step
- Prepare the cake according to the instructions on the box and bake in a suitable pan. Allow the cake to cool completely before handling.
- Crumble the cooled cake into fine crumbs using your hands or a fork. Ensure there are no large chunks for a smoother mixture.
- Add the frosting to the cake crumbs, starting with 1/4 cup and gradually adding more until the mixture is moist enough to hold together but not overly sticky.
- Roll the mixture into small balls, about 1-inch in diameter, and place them on a baking sheet lined with parchment paper. Chill the balls in the refrigerator for at least 2 hours or in the freezer for 30 minutes to firm them up.
- Melt the candy melts and vegetable oil together in a microwave-safe bowl, stirring every 30 seconds until smooth and fully melted.
- Dip the tip of each cake pop stick into the melted candy coating, then insert it halfway into a chilled cake ball. This step secures the stick to the cake ball.
- Once all sticks are inserted, dip each cake pop into the melted candy coating until fully covered. Gently tap off excess coating and stand the cake pop upright in a stand or styrofoam block.
- Decorate your cake pops with sprinkles, if desired, before the coating sets. This adds a festive look to the finished product.
- Allow the cake pops to set completely at room temperature or in the refrigerator before serving.

Makes mixing cake crumbs and frosting effortless, ensuring a smooth and consistent texture for cake pops.

An essential tool for melting candy melts evenly and efficiently for cake pops.
Simple Ingredient Swaps for Cake Pops
- Swap vanilla cake mix for chocolate if you prefer a richer flavor. The texture remains the same, but the taste is more indulgent.
- Use colored candy melts for a themed look. Choosing pastel or vibrant shades makes these cake pops perfect for holidays or special events.
- Replace sprinkles with crushed cookies or nuts for different textures. This tweak can add crunch or a unique taste to your cake pops.
Pairing Ideas and Perfect Serving Tips
- Serve with coffee or a latte to recreate the Starbucks vibe. The sweetness of the cake pops complements the rich coffee flavors perfectly.
- Pair these pops with a fruit platter for a balanced dessert table. The vibrant cake pops add visual appeal beside fresh fruits.
- Offer alongside hot chocolate during winter gatherings. The candy-coated finish pairs beautifully with a rich, creamy beverage.
- Use as party favors packed individually in clear bags. Adding ribbons or tags can enhance the presentation for weddings or birthdays.
Expert Tips for Perfect Cake Pops
- Use a food processor to crumble the cake evenly if you’re short on time. This ensures a uniform texture for rolling.
- Chill the cake balls thoroughly before dipping to prevent them from falling apart. Freezing for 30 minutes works best for a firm consistency.
- Rotate the cake pop stick gently while dipping to ensure an even candy coating. This minimizes dripping and creates a polished finish.
- Work in small batches when dipping and decorating to prevent the candy melts from hardening prematurely. Reheat as needed.
Storing and Reheating Starbucks Cake Pops
To store, place the cake pops in an airtight container in the refrigerator for up to 7 days. Ensure they are spaced apart to prevent sticking.
For longer storage, freeze the cake pops in a single layer before transferring them to freezer-safe bags. They can last up to 2 months in the freezer.
To reheat candy melts for touch-ups, microwave them in short intervals, stirring frequently. Avoid overheating to maintain the consistency.
Starbucks Cake Pop Recipe
Ingredients
Method
- Prepare the cake according to the instructions on the box and bake in a suitable pan. Allow the cake to cool completely.
- Crumble the cooled cake into fine crumbs in a large bowl using your hands or a fork.
- Add the frosting to the cake crumbs, starting with 1/4 cup and gradually adding more until the mixture is moist enough to hold together but not overly sticky.
- Roll the mixture into small balls, about 1-inch in diameter, and place them on a baking sheet lined with parchment paper. Chill in the refrigerator for at least 2 hours or in the freezer for 30 minutes.
- Melt the candy melts and vegetable oil together in a microwave-safe bowl in 30-second intervals, stirring after each interval, until smooth and fully melted.
- Dip the tip of each cake pop stick into the melted candy melts, then insert it halfway into a chilled cake ball. This helps secure the stick to the cake ball.
- Once all sticks are inserted, dip each cake pop into the melted candy coating until fully covered. Tap off excess coating gently and stand the cake pop upright in a cake pop stand or styrofoam block.
- If desired, add sprinkles to the cake pops before the coating sets.
- Allow the cake pops to set completely at room temperature or in the refrigerator before serving.
Notes
Loved this recipe? Save it to your favorite Pinterest board so you can easily find it later! ✨

Nutrition Expert - Specialty: Dietary Science & Chronic Disease Prevention I believe food is the most powerful medicine we have.